| PM | PJA |
DAM | PFM | BFM | BCM |
|
|
|
|
|
|
|
| PM | PJA |
DAM | PFM | BFM | BCM |
|
|
|
|
|
|
|
| Align a Project to a Plan |
| Edit Plan Relationships |
| Add Alignments |
| Delete Alignments |
| Align Projects to Plans via SIP (SEQ only) |
A Project can be aligned to the Group Regional Plan. Each group's plan (Aspirational Targets, Resource Condition Targets, Management Action Targets and Management Actions) has been entered into Enquire. By aligning Projects to Management Actions, regions can view how and which of their Projects are contributing to each Management Action.
A Project can be aligned/linked to as many Management Actions as relevant to the Project.
1. Select the Projects tab from the Primary Navigation or your Project portlet.
2. Open the relevant project.
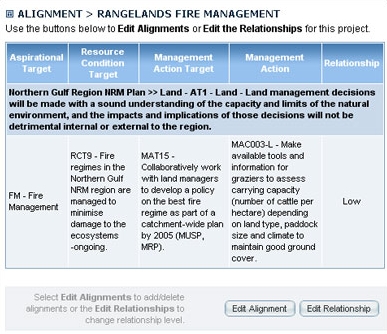
3. Select the Alignments tab at the top of the page. This will display the project's Alignment details. Access to edit details will only be available to Project Managers and above.
4. Select the Edit Alignment button.
 |
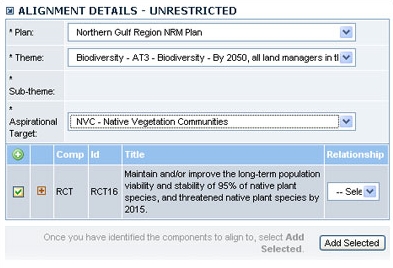
5. Drop down menus will appear enabling you to choose the plan and relevant MA you want to align the project to.
6. Select the Plan, this will pre-populate a list of Themes.
7. Select the Theme, this will pre-populate a list of ASPs.
8. Select the + to view the expandable menu , this will display a list of MATs and the linked MAs.
9. Select the checkbox next to the RCT, MAT or MA you wish to add.
10. Using the drop down menu select the relationship, High, Medium or Low.
 |
11. Select the Add Selected button.
12. Review the new Alignment and if you are happy with it select the OK button at the bottom of the page.
The Project Alignment relationship to a Plan can be edited and deleted once they have been created. The editing function allows you to edit the amount contribution. The delete function deletes the entire alignment.
1. Select the Projects tab from the Primary Navigation or your Project portlet.
2. Open the relevant project.
3. Select the Alignments tab at the top of the page. This will display the project's alignment details. Access to edit details will only be available to relevant users.
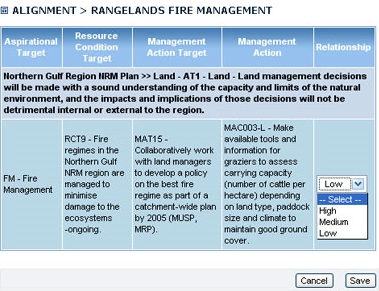
4. Select the Edit Relationship button to change relationship details. 
5. Using the drop down menu select the relationship High, Medium or Low.
|
6. Select Save
NB: In the case of Primary-Child Projects: Editing Relationship of Alignments can only be done from Child Project Alignment Tab.
Top of page
1. Select the Projects tab from the Primary navigation or view your Projects from Project portlet.
2. Open the relevant project.
3. Select the Alignments tab at the top of the page. This will display the project's alignment details. Access to edit details will only be available to relevant users.
4. Select the Edit Alignment button.

|
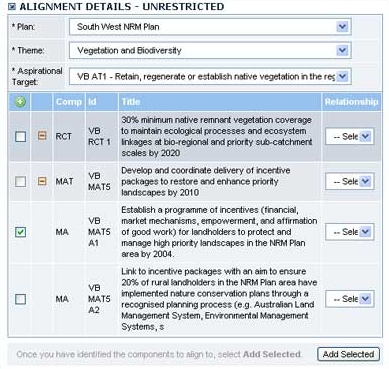
5. Using the drop down menu select the Plan, this will pre-populate a list of Themes.
6. Select the Theme, this will pre-populate a list of Aspirational Targets.
7. Select an Aspirational Target.
8. Use the + symbol beside the components (RCT, MAT, MA) to view items below and locate the action you wish to align your project to.
9. Select the checkbox beside the action and select the Relationship from the drop down menu, High, Medium or Low.
|
10. Select the Add Selected button.
11. Review the new alignment and select OK. All changes will take effect immediately.
The Project Plan Alignments can be deleted once they have been created. The delete function, deletes the entire Alignment.
1. Select the Projects tab in the Primary Navigation or view your projects from Project portlet.
2. Open the relevant project.
3. Select the Alignments tab at the top of the page. This will display the project's alignment details. Access to edit details will only be available to relevant users.
4. Select the Edit Alignments button.
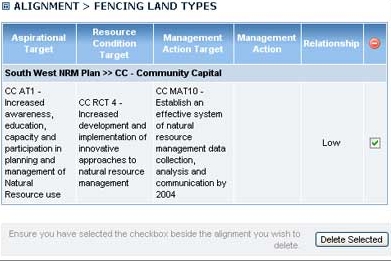
5. Select the checkbox next to the alignments you want to delete.
|
6. Select the Delete Selected button to remove the unrequired alignment.
7. Select OK to save the alignment changes. Changes will take effect immediately.
Top of page
| PM | PJA |
DAM | PFM | BFM | BCM |
|
|
|
|
|
|
|
1. Select Projects from the Primary Navigation or your Project portlet.
2. Open the relevant project.
3. Select the Alignments tab at the top of the page. This will display the project's alignment details. Access to edit details will only be available to Project Managers and above.
4. Select Edit Alignment.
5. Select Link to Plan
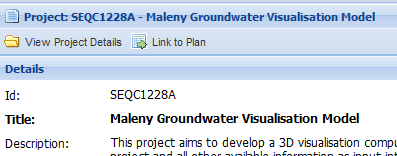
6. Drop down boxes will open. Open the relevant folders and use the check box to select which plans you would like to align to. Note: If your Primary Project has restricted alignments for child projects, the alignments chosen here will be inherited by the child projects. If you are linking a delivery/child project, your alignments may be restricted based on the Primary Project's settings.
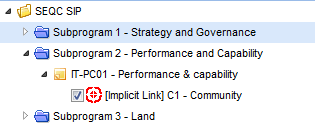
7. Select Ok.
You will now be able to see these alignments on the Alignment tab.
| DAM | PFM | BFM | BCM |
|
|
|
|
|
1. Select Plans from the Primary Navigation
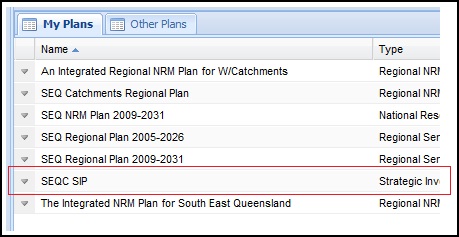
2. Select the SEQC SIP by double clicking it.
3. Use the drop down boxes in the left hand navigation panel to select a project
4. Once a project is highlighted, select Link to Plan
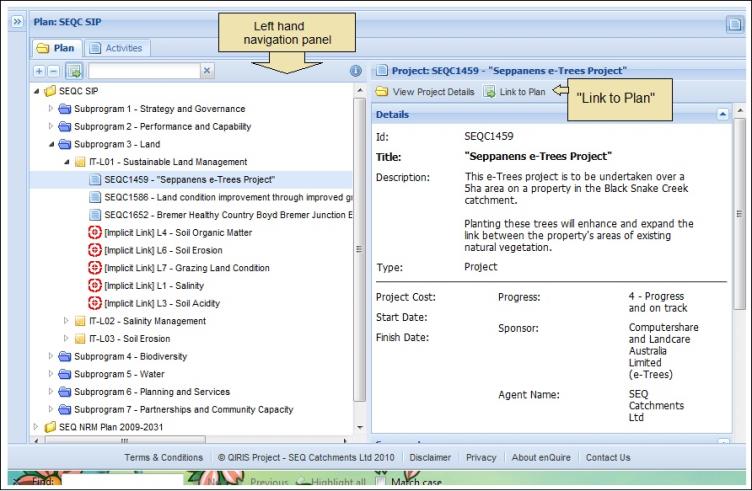
5. The following screen will appear. By using the drop down arrows you can open the SIP folder to reveal Subprograms (  ), Intermediate Targets (
  ) and Implicit Links (
  ).
).
Using the checkboxes beside the Implicit Links you can select to link to your Project. Note: If your Primary Project has restricted alignments for child projects, the alignments chosen here will be inherited by the child projects. If you are linking a child project, your alignments may be restricted based on the Primary Project's settings.
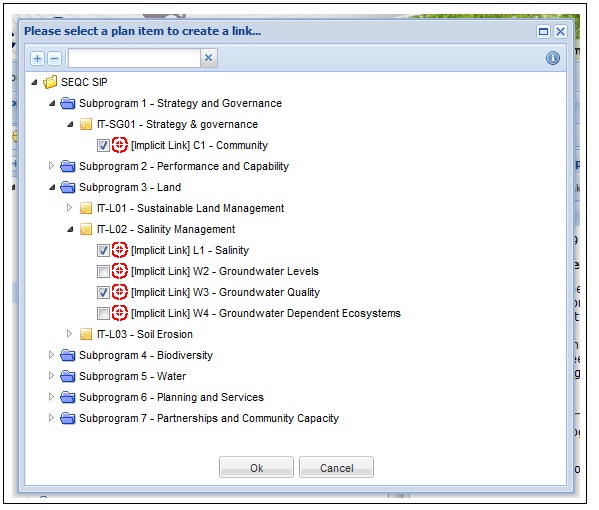
When you have completed this select Ok